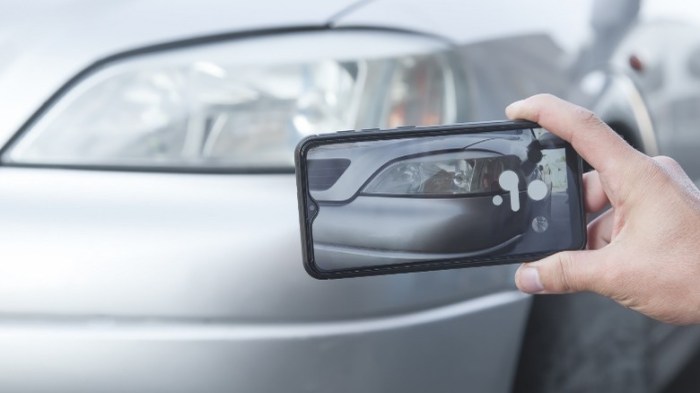
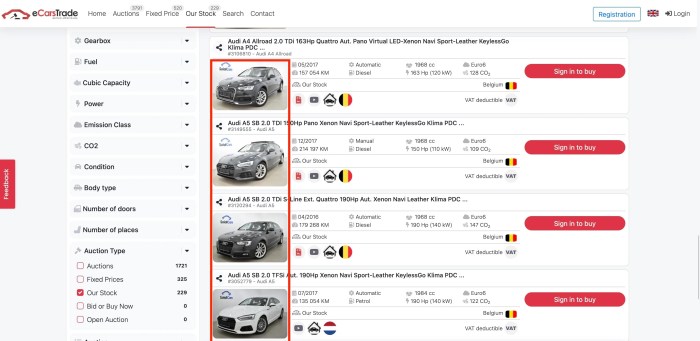
How to take good photos of your car for sale? It’s way more important than you think! Snapping killer pics can mean the difference between a quick sale and your ride sitting on the lot for ages. This guide breaks down everything from finding the perfect backdrop to mastering your camera settings, ensuring your car shines online and attracts serious buyers.
We’ll cover cleaning tips, the best angles, and even some photo editing tricks to make your car look showroom-ready.
Think of it like this: your photos are your car’s first impression. You wouldn’t show up to a job interview looking like you rolled out of bed, right? The same goes for selling your car. Let’s get you ready to make a splash with some seriously awesome photos.
Choosing the Right Location and Time
Getting the perfect shot of your car for sale involves more than just pointing your phone and snapping. The right location and time of day can dramatically impact how appealing your car looks in the photos, influencing potential buyers’ perceptions and ultimately, your chances of a quick sale. Think of it like this: you wouldn’t wear a tuxedo to a beach party, right?
So you’re selling your ride? Killer pics are key to getting a good price. Make sure you highlight all the good stuff – but remember, potential buyers will be super picky, so check out this guide on What to check when buying a used car privately to see what they’ll be looking for. That way, you can showcase those features in your photos and avoid any surprises later.
Good lighting and a clean car are your best friends!
Similarly, you wouldn’t photograph a sleek sports car in a dingy alleyway.Ideal lighting conditions are key to showcasing your car’s best features. Harsh midday sun creates harsh shadows and washes out colors, while overcast days provide a soft, diffused light that’s perfect for highlighting details without creating stark contrasts. The best time to shoot is typically during the “golden hour,” the hour after sunrise and the hour before sunset, when the light is warm, soft, and casts long, beautiful shadows.
Alternatively, a slightly overcast day provides consistently soft lighting ideal for capturing accurate color and detail.
Lighting Conditions for Optimal Car Photography
The ideal lighting conditions for car photography involve avoiding direct, harsh sunlight. Direct sunlight leads to blown-out highlights and deep, unattractive shadows. Soft, diffused light, whether from an overcast sky or the golden hour, is far more flattering. This type of light evenly illuminates the car’s surface, revealing its curves and details without harsh contrasts. Shooting in the shade on a sunny day can also work well, as long as the shade is even and doesn’t create overly dark areas.
Benefits of a Clean, Uncluttered Background
A clean, uncluttered background keeps the focus squarely on your car. Busy backgrounds distract the viewer’s eye, making it harder to appreciate the car’s lines and features. A simple, neutral background allows the car’s color and design to stand out. Think of a minimalist backdrop – an empty parking lot, a grassy field, or a plain wall. These backdrops let the car be the star of the show.
Avoid backgrounds with distracting elements like trash cans, power lines, or other cars.
Examples of Locations Showcasing a Car’s Best Features
Several locations can highlight your car’s features. An open field provides a wide, unobstructed view, perfect for showcasing the car’s overall shape and size. A scenic route, perhaps a winding coastal road or a mountain pass, can add a sense of adventure and excitement, especially for sporty or adventurous vehicles. A clean, modern parking garage, especially one with interesting architectural details, offers a controlled environment with a clean background and consistent lighting.
Each location offers a different aesthetic and should be chosen based on the car’s style and the desired overall mood.
Impact of Weather on Car Photography and Mitigation Strategies
Weather significantly impacts car photography. Rain, for instance, can create reflections and make the car appear dull. To mitigate this, wait for a break in the rain or shoot on a day with only light drizzle. A slight rain can add a dramatic effect but avoid shooting in heavy downpours. Strong winds can create dust and make it difficult to keep the car still for sharp photos.
Consider using a windbreak or scheduling the photoshoot for a calmer day. Snow can create a beautiful backdrop, but make sure the car is clean and the snow isn’t obscuring important details.
Preparing Your Car
Getting your car photoshoot-ready is key to attracting potential buyers. A clean, well-maintained car photographs much better, highlighting its best features and minimizing any flaws. Think of it as giving your car a killer first impression – you want it to shine! This section will walk you through the essential steps to prep your ride for its close-up.
Exterior Cleaning and Detailing
Thorough cleaning is the foundation of great car photos. Start by washing the entire car using a quality car wash soap and plenty of water. Pay close attention to areas that tend to accumulate dirt, like the wheel wells, tires, and lower panels. Use a separate wash mitt or sponge for the wheels to avoid transferring brake dust to the paint.
After washing, thoroughly rinse the car to remove all soap residue. Next, dry the car completely using a microfiber drying towel to prevent water spots. Follow up with a detailing spray to add extra shine and remove any lingering dust. Consider using a clay bar to remove embedded contaminants for an even smoother finish.
Scratch and Imperfection Minimization
Minor scratches and imperfections can be significantly minimized, if not entirely removed, before taking photos. For small scratches, a rubbing compound can help to buff them out. Apply the compound in small circular motions using a soft cloth, then buff off any residue. For deeper scratches, you might consider a professional detailing service. Remember, the goal isn’t to achieve a perfect, showroom-ready finish, but to minimize visible blemishes and make the car look its best in photos.
Smart use of lighting and angles can also help to downplay minor imperfections.
Interior Preparation
A clean and organized interior creates a positive impression. Begin by thoroughly vacuuming the carpets and upholstery, paying attention to crevices and hard-to-reach areas. Use a detailing brush to clean vents, door panels, and other small areas. Wipe down all surfaces with an interior cleaner, focusing on the dashboard, center console, and door handles. Don’t forget to clean the windows, both inside and out, for clear visibility.
Interior Organization and Spaciousness
A clutter-free interior makes the car appear larger and more inviting. Remove all personal belongings from the car, including papers, CDs, and anything else that might distract from the vehicle itself. Organize the remaining items neatly, such as placing the owner’s manual in the glove compartment. Consider using a car air freshener to leave a pleasant scent.
| Before | After | Before | After |
|---|---|---|---|
|
Image: A messy car interior with papers, cups, and personal items scattered throughout. |
Image: A clean and organized car interior with all personal items removed. The seats are neatly arranged, and the surfaces are clean and dust-free. |
Image: A cluttered glove compartment overflowing with items. |
Image: A neatly organized glove compartment with only essential items stored inside. |
|
Image: A stained and dirty car seat. |
Image: A clean and stain-free car seat. |
Image: A car with trash visible in the floorboards. |
Image: A car with clean and empty floorboards. |
Photography Techniques and Angles

Getting great shots of your car for sale isn’t just about snapping a few pics; it’s about showcasing its best features and making it irresistible to potential buyers. Think of your photos as a mini-advertisement – they need to grab attention and make people want to learn more. Mastering a few key photography techniques will significantly improve your chances of a quick sale.Different camera angles highlight different aspects of your car’s design and condition.
By strategically choosing your viewpoint, you can emphasize its sleek lines, sporty stance, or luxurious interior. Consider these angles to get the most comprehensive representation.
Camera Angles for Optimal Car Photography
The profile shot, ¾ view, and close-ups each provide a unique perspective. A straight-on profile shot, taken from the side, shows off the car’s length and overall shape. This is great for highlighting the car’s design. The ¾ view, angled slightly from the front or rear, offers a more dynamic perspective, emphasizing curves and showcasing the wheels and tires.
Close-ups focus on specific details like the alloy wheels, the pristine paint job, or the luxurious leather interior. These detailed shots can help highlight the car’s condition. Remember, a variety of angles is key to telling the complete story of your car.
Utilizing Leading Lines and Perspective
Leading lines are a powerful compositional tool. These are lines within the image that draw the viewer’s eye toward the car. Think of a road stretching towards the car, or a fence line leading to it. These lines create depth and visual interest, guiding the viewer’s gaze directly to the star of the show: your car. Perspective, the way objects appear to diminish in size with distance, can also be used to create a sense of scale and grandeur, particularly effective when photographing a powerful sports car or a large SUV.
So you’re selling your ride? Good pics are key to a quick sale! Make sure to show off its best angles, clean it up, and get some shots in good lighting. If you’re looking for a new set of wheels after selling, check out this list of Best cars for college students under $10k 2025 to help you find your next affordable college car.
Then, remember those killer photos when you list your new purchase!
A wide shot showcasing the car’s size against a vast landscape can be very impressive.
Composition and the Rule of Thirds, How to take good photos of your car for sale
The rule of thirds is a fundamental principle of photography. Imagine dividing your image into nine equal parts using two horizontal and two vertical lines. Placing key elements, like the car itself, at the intersections of these lines creates a more balanced and visually appealing composition. Avoid placing your car directly in the center; off-centering it often leads to a more dynamic and engaging photograph.
This simple guideline helps to create more visually interesting and balanced photos.
Wide-Angle vs. Telephoto Lenses
Wide-angle lenses capture a broader field of view, perfect for showcasing the car’s surroundings and emphasizing its size within its environment. However, wide-angle lenses can sometimes distort the car’s proportions. Telephoto lenses, on the other hand, compress perspective and create a shallower depth of field, making the car stand out against a blurred background. This effect is particularly flattering for emphasizing curves and sleekness.
The choice between wide-angle and telephoto depends on the look you want to achieve and the features you want to highlight. For example, a wide shot might show off a car’s size in a scenic location, while a telephoto shot might highlight the details of a classic car’s design.
Using Your Camera or Smartphone: How To Take Good Photos Of Your Car For Sale

Getting great shots of your car for sale doesn’t require a professional-grade DSLR; your smartphone camera or a decent point-and-shoot can do the trick with a little know-how. The key is understanding how to use your camera’s settings and harnessing natural light to showcase your car’s best features. This section will walk you through optimizing your camera settings and editing techniques to create professional-looking photos.Camera settings are crucial for achieving well-exposed and sharp images.
Different cameras offer various modes, and understanding these modes will help you control the look and feel of your photographs. Proper use of aperture, shutter speed, and ISO will significantly impact the final image quality.
Camera Settings for Optimal Car Photography
Properly adjusting aperture, shutter speed, and ISO is essential for achieving the desired depth of field and image sharpness. A wide aperture (low f-number, like f/2.8 or f/4) creates a shallow depth of field, blurring the background and emphasizing the car. A narrower aperture (high f-number, like f/8 or f/11) keeps both the car and the background in focus.
A faster shutter speed (e.g., 1/250th of a second or faster) freezes motion and prevents blur, particularly important if there’s any wind or movement. A lower ISO (e.g., 100 or 200) minimizes noise (graininess) in the image, especially important in low-light situations. However, if you need a faster shutter speed in low light, you may need to increase your ISO, accepting a bit more grain.
Using Different Camera Modes
Most cameras offer different shooting modes. Aperture Priority (Av or A) lets you control the aperture while the camera automatically sets the shutter speed. This is great for controlling depth of field. Shutter Priority (Tv or S) allows you to control the shutter speed, useful for freezing motion or creating motion blur. Manual (M) mode gives you complete control over both aperture and shutter speed, offering the most creative freedom but requiring more understanding of exposure.
For car photography, Aperture Priority is often the best starting point, allowing you to focus on getting a shallow depth of field to make your car pop.
Effective Use of Natural Light
Natural light is your best friend in car photography. Shoot on an overcast day or during the golden hour (the hour after sunrise and the hour before sunset) for soft, diffused light that minimizes harsh shadows. Avoid shooting in direct midday sun, as it creates harsh contrasts and unflattering shadows. Position the car so that the light falls evenly across its surface, avoiding strong backlighting that can cause the car to appear silhouetted.
Consider using a reflector to bounce light into shadowed areas, enhancing detail and evenness.
Photo Editing Software Enhancement
Even the best photos benefit from a little post-processing. Software like Adobe Lightroom, Photoshop, or even free mobile apps like Snapseed can help you enhance your images. Adjusting brightness and contrast can improve the overall look and feel. Sharpening can bring out details, while carefully using tools like the healing brush can remove minor imperfections. Remember, subtle adjustments are key; avoid over-processing, which can make your photos look unnatural.
The goal is to enhance, not to create something artificial.
Presenting Your Photos Online

Getting your car photos online and noticed is the final, crucial step. A poorly presented listing, even with amazing photos, can sink your chances of a quick sale. Think of your online listing as your car’s digital showroom – it needs to be clean, well-lit, and inviting. This section will help you create a listing that does just that.
High-quality photos are essential, but how you present them online is equally important. Consistent image quality, effective organization, and informative captions are key ingredients for a successful online listing. This will influence potential buyers’ first impressions, potentially leading to quicker sales and better offers.
Sample Online Listing with Image Gallery
Below is an example of how to structure your online listing using HTML tables to create an organized image gallery. Remember to adjust this template to fit the specific platform you’re using (e.g., Craigslist, Facebook Marketplace, eBay Motors).
| Exterior | Interior | Engine Bay |
|---|---|---|
 |
 |
 |
 |
 |
 |
Remember to replace “placeholder.jpg” with the actual file paths to your images. The alt text descriptions are crucial for accessibility and .
Image Quality and Editing Style Consistency
Maintaining a consistent look and feel across all your images is critical. Use the same editing style (brightness, contrast, saturation) for all photos. Inconsistent editing makes your listing look unprofessional and can detract from the overall appeal of your car. Imagine one photo being overly bright and another overly dark – it’s jarring and confusing for the viewer.
Image Resolution and File Size Requirements
Online platforms have varying requirements for image resolution and file size. Generally, higher resolution images (at least 1920×1080 pixels) are preferred, but excessively large files can slow down loading times. Aim for a balance – high enough resolution for detail, but small enough for quick loading. Most online platforms provide guidelines on ideal image dimensions and file sizes.
Check the specific requirements before uploading.
Captions Highlighting Key Features
Don’t just upload photos; tell a story with them! Use captions to highlight key features, upgrades, or unique selling points. For example, instead of just “Interior shot,” use “Luxurious leather interior with heated seats and premium sound system.” Compelling captions draw the viewer’s attention and emphasize the value proposition of your car.
Illustrative Examples
Okay, so you’ve got the location, the car’s prepped, and you’re ready to shoot. Let’s look at some specific examples to really drive home (pun intended!) the best ways to photograph your car for sale. These examples will show you how different lighting, angles, and compositions can make all the difference.
Exterior Shot in Bright Sunlight
This shot showcases a vibrant red sports car parked on a slightly inclined driveway. The sun is high in the sky, creating minimal shadows and highlighting the car’s glossy paint. The angle is slightly elevated, taken from about three feet away and slightly to the side, giving a three-quarter view that emphasizes the car’s curves and sporty design. The composition is clean; the background is a simple, uncluttered expanse of lawn, preventing distractions from the car itself.
The bright sunlight reveals the depth of the red paint, showcasing its shine and reflecting light off the polished chrome accents. This angle also allows the viewer to see the car’s overall profile effectively.
Interior Shot Focusing on Dashboard and Seating
This interior shot is taken from a slightly low angle, looking across the dashboard toward the back seats. The lighting is soft and diffused, achieved either through slightly overcast skies or by using a diffuser on a flash. This avoids harsh shadows on the leather seats and the dashboard’s surfaces. The composition emphasizes the spaciousness of the interior. The focus is sharp on the dashboard, highlighting the infotainment screen and instrument cluster.
The clean lines of the dashboard are clearly visible, and the leather seats are shown to be in excellent condition. The background is blurred slightly, drawing the viewer’s eye to the key features of the interior.
Close-Up Shot of a Specific Feature: Wheels
This close-up shot focuses on one of the car’s alloy wheels. The lighting is directional, possibly from a side light source or reflector, creating subtle shadows that highlight the wheel’s intricate design and the deep contours of the spokes. The angle is from a low perspective, emphasizing the wheel’s size and detailing. The composition is simple, focusing solely on the wheel against a neutral background—perhaps a portion of the car’s body or a plain wall—to avoid distractions.
The sharp focus and detailed lighting make the wheel’s condition and quality perfectly clear. The viewer can easily appreciate the craftsmanship and the overall condition of the wheel.
Closure
Selling your car shouldn’t be a drag, and with a little know-how, snapping great photos is easier than you think. By following these tips – from prepping your car to choosing the right angles and lighting – you’ll create a listing that pops. Remember, high-quality photos mean more views, more interest, and ultimately, a faster, smoother sale. So ditch the blurry snapshots and get ready to showcase your ride in the best possible light (literally!).
Happy selling!


