How to fix a stuck car window? It’s a total bummer, right? One minute you’re cruising, the next you’re wrestling with a stubborn pane of glass. Whether it’s a jammed regulator, a blown fuse, or some wonky wiring, a stuck window can quickly turn a pleasant drive into a frustrating ordeal. This guide breaks down the common causes, from simple fixes you can tackle yourself to when you should call in the pros.
Get ready to roll down that window again!
We’ll cover everything from basic troubleshooting steps like checking fuses and the window switch to more advanced techniques involving inspecting the regulator and wiring. We’ll even help you decide if a DIY repair is feasible or if it’s time to hand the wrench to a mechanic. By the end, you’ll be equipped to handle most window woes, saving you time, money, and a whole lot of frustration.
Identifying the Problem

So, your car window’s stuck? Before you start wrenching, let’s figure outwhy*. A stuck window isn’t just inconvenient; it can be a real safety hazard, especially in emergencies. Understanding the root cause is key to fixing it quickly and effectively. This section will cover the most common mechanical and electrical culprits behind a malfunctioning car window.
Stuck car windows are usually caused by a combination of mechanical and electrical issues. Sometimes, it’s a simple fix, while other times it requires a bit more know-how (or a trip to the mechanic). Let’s break down the possibilities.
Mechanical Causes of Stuck Car Windows
Mechanical problems often stem from the window regulator, the system of gears, motors, and cables that actually move the glass. Wear and tear, especially in older cars, is a major factor. Over time, these parts can break, bend, or become misaligned, leading to a jammed window. Another common mechanical issue involves the window tracks themselves. Dirt, debris, or even ice can accumulate in the tracks, creating friction that prevents smooth movement.
Finally, the window itself might be damaged, such as a cracked or warped window pane, interfering with its proper function.
Electrical Causes of Stuck Car Windows
Electrical problems usually involve the window motor, the switch, or the wiring connecting them. A faulty motor is a frequent culprit; it might be burned out, jammed, or simply not receiving power. A broken window switch, either on the door panel or the master control, can also prevent the window from moving. Damaged or corroded wiring, especially in older vehicles prone to rust, can interrupt the electrical signal to the motor.
Sometimes, a blown fuse can also be the simple solution to a seemingly complex problem.
Safety Hazards Associated with Stuck Car Windows
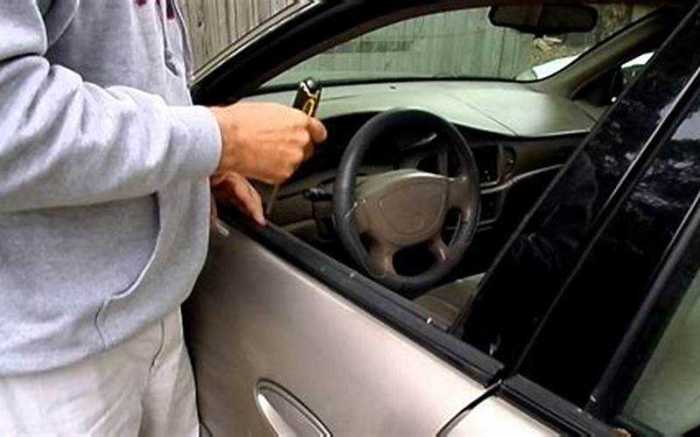
A stuck window poses several safety risks. In a rollover accident, a window that won’t open can severely hinder escape. Similarly, a stuck window can prevent quick egress in the event of a fire or other emergency. Furthermore, a stuck window can compromise vehicle security, making it easier for thieves to gain access to the interior. Even a partially stuck window can create a significant ventilation problem on hot days, potentially leading to heatstroke.
Comparison of Causes of Stuck Windows
| Cause | Symptoms | Likelihood | Difficulty of Repair |
|---|---|---|---|
| Faulty Window Regulator | Window won’t move at all, or makes grinding noises | High (especially in older cars) | Medium to High (often requires disassembly) |
| Broken Window Motor | Window doesn’t respond to switch | Medium | Medium (motor replacement may be needed) |
| Damaged Window Tracks | Window binds or moves unevenly | Medium | Low to Medium (cleaning or lubrication may suffice) |
| Faulty Window Switch | Window doesn’t respond to the switch, but other functions work | Low to Medium | Low (switch replacement is usually straightforward) |
| Blown Fuse | Window and other electrical components in the same circuit are not working | Low | Very Low (fuse replacement is simple) |
| Damaged Wiring | Intermittent window operation or complete failure | Medium (especially in older cars with corrosion) | Medium to High (requires tracing and repair of wiring) |
Basic Troubleshooting Steps: How To Fix A Stuck Car Window
Okay, so your car window’s stuck. Before you panic and call a mechanic (and potentially pay a hefty bill!), let’s try some basic troubleshooting. Often, the problem is simpler than you think. This section will walk you through some easy checks you can do yourself.
Checking the Car’s Fuses
Fuses are small, safety devices that protect your car’s electrical system from overloads. A blown fuse can easily interrupt power to your window motor. First, consult your car’s owner’s manual to locate the fuse box and identify the fuse responsible for the power windows. This is usually clearly labeled. Once you’ve located the correct fuse, carefully remove it using fuse pullers (usually included in the fuse box) or a pair of needle-nose pliers.
Inspect the fuse’s thin wire filament. If the filament is broken or melted, the fuse is blown and needs replacing. Replace it with a fuse of the same amperage rating (printed on the fuse itself). If the new fuse blows immediately after replacement, there’s a more serious electrical problem, and you should consult a professional.
Inspecting the Window Regulator Switch
The window switch itself can also be the culprit. Over time, these switches can wear out, become damaged, or simply get jammed. Carefully examine the switch for any visible signs of damage, such as cracks, broken pieces, or anything out of place. Try gently wiggling the switch – if it feels loose or unresponsive, it might be the source of your problem.
Sometimes, simply cleaning the switch with compressed air or a contact cleaner can resolve the issue by removing any debris that’s interfering with its function. If the switch feels broken or shows clear damage, replacement is likely necessary.
Manually Checking the Window Motor
To check if the window motor itself is working, you’ll need a multimeter. This is a basic electrical testing tool that can measure voltage and continuity. First, disconnect the electrical connector from the window motor. Then, set your multimeter to the continuity test setting (usually indicated by a diode symbol). Touch one probe of the multimeter to one terminal of the motor connector, and the other probe to the other terminal.
If the multimeter beeps or shows a closed circuit, the motor is likely good. If there’s no beep or open circuit, the motor might be faulty and require replacement. Remember to always disconnect the battery negative terminal before working with electrical components to prevent accidental shocks.
Simple Solutions for Minor Window Malfunctions
Sometimes, the problem is incredibly simple! Before you dive into more complex troubleshooting, consider these quick fixes:
- Check the door lock: Sometimes, the power windows are linked to the door lock mechanism. Ensure the door is properly locked and unlocked.
- Try the other windows: If only one window is malfunctioning, it isolates the problem to that specific window mechanism.
- Check for obstructions: Something might be jamming the window, preventing it from moving. Carefully inspect the window track for debris, ice, or anything else that might be interfering with its movement.
- Lubricate the window tracks: Apply silicone-based lubricant to the window tracks to reduce friction and improve movement.
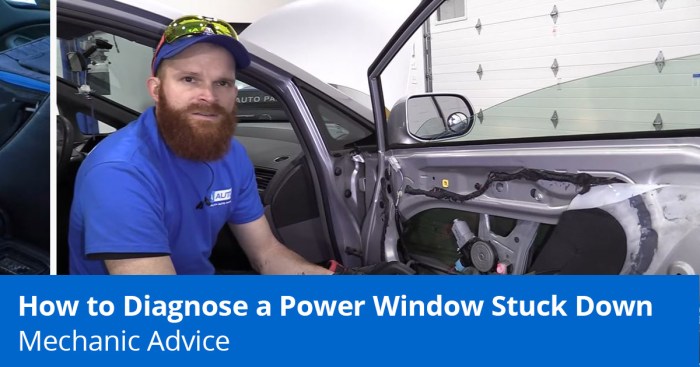
Advanced Troubleshooting
Okay, so you’ve tried the basic stuff and your window’s still stuck? Time to get a little more hands-on. This section dives into the mechanical guts of your car window system – we’re talking window regulators, cables, and motors. Don’t worry, it’s not as scary as it sounds, but it does require a bit more patience and maybe some specialized tools.Accessing and inspecting the window regulator mechanism usually involves removing the door panel.
This process varies depending on your car’s make and model, so consult your owner’s manual or a repair guide specific to your vehicle. Generally, you’ll need to remove screws, pry off plastic clips, and disconnect electrical connectors. Once the panel is off, you’ll see the regulator mechanism, a complex system of gears, tracks, and a cable that moves the window up and down.
Carefully inspect all components for damage, broken parts, or signs of excessive wear. Look for bent tracks, frayed cables, or a seized motor.
Window Regulator Track Lubrication
Proper lubrication is crucial for smooth window operation. Dry or grimy tracks are a common cause of sticking windows. Before lubricating, thoroughly clean the tracks with a degreaser and a brush to remove any dirt, grime, or old lubricant. Once clean, apply a silicone-based lubricant to the tracks. Avoid using grease or oil, as these can attract dirt and gum up the mechanism.
So, your car window’s jammed? That’s a total bummer, especially in this heat. Sometimes, a little WD-40 and some gentle coaxing will do the trick, but if that doesn’t work, you might need to tackle a more serious mechanical issue. It’s kind of like bleeding your brakes; if you’re not comfortable doing that, check out this super helpful guide on How to bleed brakes at home , which will give you a better idea of the level of DIY car repair you’re capable of.
Getting that window fixed is key though, so keep trying those simple solutions first!
After applying the lubricant, carefully move the window up and down several times to distribute the lubricant evenly. This simple step can often resolve minor sticking issues.
Broken Window Regulator Cable Replacement
A broken window regulator cable is a more serious issue requiring replacement. Replacing the cable often necessitates removing the entire window regulator assembly. This involves disconnecting the motor, removing the regulator from the door, and carefully replacing the cable according to the manufacturer’s instructions or a repair manual. The cable itself is usually a thin, flexible steel cable that can snap or fray over time, particularly if the window is frequently forced or if the regulator is poorly lubricated.
Remember, working with the regulator assembly requires precision and patience to avoid damaging other parts.
Faulty Window Motor Replacement
Replacing a faulty window motor is a more involved repair that often requires more specialized tools. You’ll need a socket set, screwdrivers (Phillips and flathead), possibly a torque wrench, and possibly a multimeter to test the motor’s electrical continuity. First, disconnect the battery’s negative terminal for safety. Then, access the window motor (usually located within the door panel) and carefully disconnect the electrical connector and any mounting bolts.
Once removed, compare the old motor to the new replacement to ensure compatibility. Installation is generally the reverse of removal. Reconnect the electrical connector, mount the motor securely, and test the window operation. Remember to reconnect the battery’s negative terminal after the replacement.
Addressing Electrical Issues
So, your window’s stuck, and we’ve ruled out the mechanical stuff. Time to dive into the electrical system – the unsung hero (or villain, in this case) of your window’s smooth operation. Faulty wiring, a dead switch, or a power problem can all cause this frustrating issue. Let’s troubleshoot these electrical gremlins.The window regulator’s electrical system is relatively straightforward, but pinpointing the exact problem requires a systematic approach.
We’ll look at common failure points, how to trace wiring, and how to test components. Remember, safety first! Disconnect the battery’s negative terminal before starting any electrical work.
Window Wiring Harness Inspection, How to fix a stuck car window
The window motor receives power through a wiring harness. This harness runs from the window switch, through various components, and finally to the motor itself. Breaks, chafing, or corrosion at any point in this harness can interrupt the power flow and prevent the window from moving. A visual inspection is your first step. Carefully examine the harness along its entire route, paying close attention to areas where the wires might rub against sharp edges or metal parts of the car’s body.
Look for any exposed wires, frayed insulation, or signs of corrosion. Common trouble spots include the area where the harness enters the door and the connections at the motor itself. If you find any damage, you’ll need to repair or replace the affected section of the harness.
Tracing and Repairing Damaged Wires
If you spot a damaged wire, carefully trace its path back to its source. Use a multimeter set to continuity testing to verify if the break is complete. If it is, you’ll need to repair the wire. This typically involves splicing the broken ends together using a suitable connector or soldering them, ensuring the connection is secure and insulated to prevent short circuits.
Remember to use electrical tape or heat-shrink tubing to properly insulate the repair. For extensive damage, replacing the entire harness might be necessary.
Testing Window Switch Continuity
The window switch itself can fail, preventing the signal from reaching the motor. Using a multimeter set to the ohms setting, test the continuity of the switch in its various positions. Disconnect the switch connector from the harness first. With the multimeter leads touching the appropriate terminals of the switch connector, the multimeter should show a low resistance (near zero ohms) when the switch is activated.
If there’s no continuity, the switch needs to be replaced. Always refer to your vehicle’s wiring diagram to identify the correct terminals for testing.
Electrical Troubleshooting Flowchart
This flowchart visually guides you through the electrical troubleshooting process:[Imagine a flowchart here. It would start with “Window Stuck?” Yes would lead to “Check Fuses.” No would lead to the end. From “Check Fuses,” a “Blown Fuse?” branch would lead to “Replace Fuse” and then “Window Works?” (Yes/No). A “No” on “Blown Fuse?” would lead to “Inspect Wiring Harness.” “Damage Found?” would branch to “Repair/Replace Wiring.” “No Damage?” would lead to “Test Window Switch.” “Switch Faulty?” would branch to “Replace Switch.” “Switch Okay?” would lead to “Check Motor.” “Motor Faulty?” would lead to “Replace Motor.” Finally, all “Window Works?” (Yes) branches would lead to the end.]
Seeking Professional Help
So, you’ve tried everything – WD-40, the trusty hammer tap (gently, of course!), jiggling the switch, even muttering automotive incantations. Your car window remains stubbornly stuck. At this point, it’s time to consider calling in the professionals. Knowing when to give up the DIY battle and seek expert assistance can save you time, frustration, and potentially, more money in the long run.Sometimes, a stuck car window isn’t just a minor inconvenience; it can signal a more serious underlying problem.
Ignoring these issues can lead to further damage and increased repair costs down the road. Weighing the pros and cons of DIY versus professional help is crucial in making the right decision.
So, your car window’s jammed? Try lubricating the tracks – that usually works. But if you’re also seeing weird stuff happening with your engine, like a flashing check engine light, that’s a whole different ballgame. Check out this article if that’s happening: Why is my check engine light flashing? Anyway, back to that window – if the lubricant doesn’t do the trick, you might need to look at the motor itself.
Situations Requiring Professional Assistance
Professional help is essential when dealing with significant mechanical or electrical failures. For example, if you suspect damage to the window regulator, motor, or wiring harness, a professional diagnosis is necessary. These repairs often require specialized tools and expertise that the average person doesn’t possess. Additionally, if the window is completely shattered or severely damaged, attempting a DIY repair could be hazardous.
A professional can safely handle the broken glass and ensure proper replacement. Finally, if your attempts at DIY repair have worsened the situation, it’s a clear sign to seek professional help.
Cost Comparison: DIY vs. Professional Service
The cost of DIY repairs can vary widely depending on the parts you need to purchase. A simple lubricant might cost a few dollars, while a new window regulator could easily run into hundreds. Add in the time spent troubleshooting and repairing, and the “cost” of your DIY attempt can quickly escalate. Professional service costs depend on the mechanic’s labor rates and the extent of the repairs.
A simple lubrication might cost around $50-$100, while replacing a window regulator could range from $200 to $500 or more, depending on the vehicle’s make and model. While DIY might seem cheaper initially, the risk of causing further damage and incurring higher repair costs later makes professional help a more cost-effective option in many cases. Consider the value of your time as well – is your time worth the potential savings of a DIY repair?
Finding a Reputable Auto Mechanic
Finding a reliable mechanic specializing in window repairs requires some research. Start by asking for recommendations from friends, family, or colleagues. Online reviews on sites like Yelp or Google Reviews can provide valuable insights into the experiences of other customers. Check the mechanic’s licensing and certifications to ensure they are qualified and insured. Don’t hesitate to call several mechanics to compare prices and services.
Look for mechanics who are transparent about their pricing and who provide a clear explanation of the repairs needed.
Repair Options: DIY vs. Professional
| Feature | DIY Repair | Professional Repair |
|---|---|---|
| Cost | Potentially lower initial cost, but can escalate with unforeseen issues. | Higher initial cost, but often more cost-effective in the long run. |
| Time | Can be time-consuming and frustrating, potentially taking hours or even days. | Usually quicker and more efficient, minimizing downtime. |
| Expertise | Requires some mechanical aptitude and knowledge. | Performed by trained professionals with specialized tools and expertise. |
| Warranty | No warranty on DIY repairs. | Often comes with a warranty on parts and labor. |
Preventative Maintenance
Keeping your car windows functioning smoothly isn’t just about avoiding embarrassing breakdowns; it’s about ensuring your safety and comfort. Regular maintenance prevents costly repairs and keeps your car feeling like new. A little preventative care goes a long way in avoiding the frustration of a stuck window.Regular cleaning and lubrication are key to preventing window mechanism issues. Neglecting these simple tasks can lead to grime buildup, which causes friction and ultimately, window failure.
The type of lubricant you use also plays a crucial role; the wrong lubricant can actually attract more dirt and damage the delicate window components.
Window Track Cleaning and Lubrication
Clean window tracks should be a part of your regular car cleaning routine. Accumulated dust, dirt, and debris interfere with the smooth operation of the window mechanism. Use a stiff brush, a vacuum cleaner with a crevice tool, or compressed air to thoroughly remove all loose particles from the tracks. Then, use a degreaser or a mild detergent solution and a soft cloth or brush to remove any remaining grime.
After the tracks are completely dry, apply a silicone-based lubricant specifically designed for automotive window tracks. Avoid using WD-40 or other general-purpose lubricants, as these can attract more dirt and eventually gum up the works. Apply the lubricant sparingly and work it into the tracks using a small brush or cloth.
Preventative Maintenance Schedule
Preventative maintenance for your car windows should be incorporated into your regular car care schedule. This ensures the longevity of the window mechanisms and avoids more serious problems down the line.
- Monthly Cleaning: Use a vacuum cleaner with a crevice tool to remove loose debris from window tracks. Wipe down the tracks with a damp cloth to remove any surface dirt.
- Quarterly Lubrication: Apply a silicone-based lubricant to the window tracks, focusing on the areas where the window glides.
- Yearly Deep Clean: Perform a more thorough cleaning of the window tracks, removing any stubborn grime with a degreaser and brush. Reapply lubricant after the tracks are completely dry.
- Inspect Window Seals: Regularly inspect the rubber seals around your windows for any signs of wear or damage. Replace damaged seals as needed to prevent water leaks and maintain a good seal.
Remember, consistent maintenance is far more effective than emergency repairs. By following this schedule, you can significantly extend the life of your car windows and avoid the hassle of a stuck window. Proper lubrication is crucial; using the correct lubricant, specifically a silicone-based one designed for automotive use, is key to smooth window operation and preventing future problems.
Avoid petroleum-based lubricants, as they can attract and hold dirt, eventually causing more harm than good.
Conclusive Thoughts
So, there you have it – a comprehensive guide to conquering that pesky stuck car window! From simple checks to more involved repairs, we’ve covered the spectrum. Remember, safety first. If you’re uncomfortable tackling any of these steps, don’t hesitate to call a pro. But with a little patience and these tips, you might just be able to fix it yourself and feel the satisfaction of a job well done.
Now get out there and enjoy the open air (or at least, the ability to roll your windows up and down!).