Chrome delete kits for Tesla Model 3? Yeah, you know, that whole blacked-out, stealthy look? It’s totally blowing up right now. This isn’t just about aesthetics; we’re talking about transforming your Model 3’s appearance, from flashy chrome to a sleek, modern vibe. Whether you’re a DIY enthusiast or prefer pro help, we’ll break down everything you need to know, from choosing the right kit to nailing that perfect install and keeping it looking fresh.
We’ll cover the different types of kits – vinyl wraps, paint jobs, the whole shebang – and weigh the pros and cons of each. We’ll also give you the lowdown on costs, tools, and the whole installation process, step-by-step. Think of this as your ultimate guide to rocking that killer chrome delete.
Understanding “Chrome Delete Kits” for Tesla Model 3
So you’ve got a Tesla Model 3 and you’re eyeing that chrome trim? Lots of owners feel the chrome clashes with the sleek, modern aesthetic of the car. Chrome delete kits offer a solution, transforming the look with a cleaner, more cohesive finish. Let’s break down what’s involved.
Types of Chrome Delete Kits
Chrome delete kits for the Tesla Model 3 primarily fall into three categories: vinyl wraps, paint, and pre-painted parts. Vinyl wraps are essentially adhesive-backed vinyl sheets cut to precisely fit the chrome trim pieces. Paint involves professionally or DIY painting the chrome directly. Pre-painted parts are replacement pieces already painted in a matte black or other desired color.
Each option presents a unique balance of cost, effort, and longevity.
Vinyl Wrap Installation
Vinyl wrap installation is generally considered a DIY-friendly option. Kits usually include detailed instructions, and numerous online tutorials offer visual guidance. The process typically involves cleaning the chrome trim thoroughly, applying the vinyl carefully to avoid bubbles or wrinkles, and using a heat gun to help it conform to curves. Patience and precision are key. Improper application can lead to lifting or peeling over time.
Paint Installation
Painting requires more skill and specialized tools. Proper preparation is crucial – this includes sanding the chrome to ensure proper adhesion of the primer and paint. Multiple coats of primer, paint, and clear coat are usually necessary for a durable and even finish. Masking off adjacent areas is also essential to prevent accidental overspray. While offering a potentially more durable and seamless result than vinyl, it’s more prone to imperfections if not done by an experienced professional.
Cost-Effectiveness of Chrome Delete Options
Vinyl wrap kits are typically the most budget-friendly option, ranging from $50 to $200 depending on the quality and completeness of the kit. Professional paint jobs can cost several hundred dollars, even exceeding $1000 depending on the shop and level of detail. Pre-painted parts fall somewhere in between, usually costing a few hundred dollars for a complete set.
Consider the long-term cost – a poorly applied vinyl wrap might require replacement sooner than a professionally painted job.
DIY vs. Professional Installation, Chrome delete kits for Tesla Model 3
DIY installation, particularly with vinyl wraps, can save significant money. However, it requires time, patience, and a steady hand. A poorly executed DIY job can look unprofessional and may even damage the original chrome trim. Professional installation guarantees a high-quality result, but comes with a higher price tag. For someone lacking experience or confidence, professional installation is a safer bet to ensure a clean and long-lasting finish.
For those comfortable with detail-oriented projects, a vinyl wrap DIY is a cost-effective and satisfying option.
Materials and Tools Required

So, you’re ready to ditch that chrome and give your Tesla Model 3 a sleek, updated look? Awesome! Before you dive in, let’s make sure you have everything you need for a smooth, successful chrome delete. Having the right materials and tools will save you time, frustration, and potentially some costly mistakes.This section Artikels the essential materials and tools, providing sourcing tips and a handy checklist to keep you organized.
Remember, preparation is key to a great outcome!
Materials List
Gathering the right materials is crucial for a professional-looking chrome delete. The quality of your materials directly impacts the final appearance and longevity of your project. Below is a typical list, but always check your specific kit’s instructions for any variations.
| Item | Quantity | Source | Cost (Estimate) |
|---|---|---|---|
| Vinyl Wrap (Matte Black is popular) | Sufficient for all chrome trim pieces (check kit instructions) | Online retailer (e.g., Amazon, specialty vinyl suppliers), local auto parts store | $50 – $150 |
| Application Solution (Soap and Water Mix) | 1-2 spray bottles | Grocery store, auto parts store | <$10 |
| Squeegee | 1-2 (felt-edged is recommended) | Auto parts store, online retailer | $10 – $20 |
| Microfiber Cloths | Several (for cleaning and application) | Auto parts store, online retailer, grocery store | $10 – $20 |
| Heat Gun (or Hair Dryer) | 1 | Auto parts store, hardware store, online retailer | $20 – $50 |
| Measuring Tape | 1 | Hardware store, online retailer | <$10 |
| Utility Knife (or Razor Blade) | 1 (with extra blades) | Hardware store, online retailer | <$10 |
| Plastic Trim Removal Tools (Optional, but helpful) | Set | Auto parts store, online retailer | $15 – $30 |
Specialized Tools and Their Use
While many tools are readily available, certain specialized tools can significantly improve the precision and ease of your chrome delete. Investing in these can lead to a much cleaner and more professional finish.
A felt-edged squeegee is crucial for smoothing out the vinyl wrap and preventing air bubbles. The felt edge prevents scratching the delicate surfaces of your Tesla. A heat gun (or a hair dryer in a pinch) helps to stretch and conform the vinyl to the curves and contours of your trim pieces, ensuring a snug fit. Finally, plastic trim removal tools are highly recommended to safely remove existing trim pieces without causing damage.
These tools are designed to gently pry and release clips and fasteners without scratching or marring the surrounding paint.
Sourcing High-Quality Materials
To achieve the best results, using high-quality materials is paramount. Researching different vinyl wrap brands and reading reviews can help you make an informed decision. Comparing prices from various online retailers and local auto parts stores can also help you find competitive deals. Don’t solely focus on the cheapest option; consider the reputation of the brand and the reviews of other users.
A slightly more expensive, higher-quality vinyl will likely yield better results in terms of longevity and appearance. For example, 3M vinyl wrap is a popular choice among enthusiasts due to its quality and durability.
Pre-Project Checklist
Before you start, ensure you have all the necessary materials and tools at hand. This checklist helps prevent mid-project interruptions and ensures a smoother workflow.
- Vinyl Wrap (correct amount)
- Application Solution (soap and water mix)
- Squeegee (felt-edged)
- Microfiber Cloths
- Heat Gun (or hair dryer)
- Measuring Tape
- Utility Knife (with extra blades)
- Plastic Trim Removal Tools (optional)
- Clean, well-lit workspace
Step-by-Step Installation Guide
Installing a chrome delete kit on your Tesla Model 3 might seem daunting, but with careful preparation and a methodical approach, you can achieve a professional-looking finish. This guide will walk you through each step, from prepping the surfaces to applying the vinyl wrap, ensuring a smooth and successful installation. Remember to always consult your specific kit’s instructions as variations may exist.
This section provides a detailed, step-by-step guide to installing your chrome delete kit. Success depends on careful preparation and precise application.
So, you’re thinking about those chrome delete kits for your Tesla Model 3? They look awesome, but if something goes wrong during installation and you need to file a claim, knowing how to navigate the process is key. Check out this guide on How to file a claim with USAA if that’s your insurer; it’ll make things way easier.
Then, you can get back to admiring your sweet, chrome-deleted Tesla!
Surface Preparation
Proper surface preparation is crucial for a successful installation and prevents peeling or bubbling. Thorough cleaning removes contaminants that could compromise adhesion.
- Wash the areas to be wrapped thoroughly with soap and water. Pay special attention to removing any dirt, grime, or bugs.
- Rinse the areas completely to eliminate all soap residue.
- Dry the surfaces completely using a clean, microfiber towel. Avoid leaving any lint behind.
- Use an isopropyl alcohol solution (around 70%) to further clean and degrease the surfaces. This removes any remaining contaminants invisible to the naked eye.
- Allow the surfaces to dry completely before proceeding. This ensures optimal adhesion of the vinyl wrap.
Measuring and Cutting the Vinyl Wrap
Accurate measurement and cutting are essential to avoid wasting material and ensure a perfect fit. Take your time and double-check your measurements before cutting.
- Carefully measure the area to be covered. Consider adding a small extra margin (about half an inch) for easier application and trimming.
- Use a sharp blade, like a craft knife or hobby knife, to cut the vinyl. A sharp blade ensures clean cuts, preventing fraying.
- For complex shapes, it’s helpful to use a template. This could involve tracing the area on paper and then transferring the pattern to the vinyl.
- Remember to apply the vinyl with the adhesive side facing down.
Applying the Vinyl Wrap
Applying the vinyl requires patience and a steady hand. Take your time and work slowly to avoid mistakes.
- Begin by peeling back a small portion of the backing paper, exposing a few inches of the adhesive.
- Carefully align the vinyl with the surface and apply it slowly, smoothing it out with a squeegee or a microfiber cloth, working from the center outwards to eliminate air bubbles.
- Use a heat gun (on a low setting) to help the vinyl conform to curves and edges. This will also help remove any stubborn wrinkles.
- Trim any excess vinyl carefully using a sharp blade.
- Once applied, firmly press the vinyl to ensure good adhesion.
Troubleshooting Common Issues
Even with careful preparation, issues can arise. Knowing how to address these problems can save your project.
- Air Bubbles: Use a small needle to carefully puncture any large air bubbles, then smooth them out with a squeegee or cloth. Small bubbles often disappear on their own as the vinyl settles.
- Wrinkles: Gently lift the affected area and reapply it, smoothing out any wrinkles as you go. A heat gun can help.
- Lifting Edges: Use a heat gun to gently warm the edge and press it firmly back down. Consider adding additional adhesive if necessary (consult your kit’s instructions).
- Uneven Application: If the vinyl appears uneven, carefully peel it back and reapply, taking extra care to smooth it out.
Post-Installation Care and Maintenance
Keeping your freshly chrome-deleted Tesla Model 3 looking sharp requires a little TLC. Proper care will extend the life of your vinyl wrap and protect your car’s paint job. Think of it as an investment—a little preventative maintenance goes a long way.Proper cleaning and maintenance are crucial for preserving the appearance and longevity of your chrome delete. Ignoring this can lead to premature wear and tear, diminishing the aesthetic appeal of your modification.
The following guidelines will help maintain the quality of your Tesla’s new look.
Cleaning and Maintaining a Chrome-Deleted Tesla Model 3
Regular washing is key. Use a touchless car wash or hand wash with a gentle, pH-neutral car wash soap. Avoid harsh chemicals, abrasive cleaners, and high-pressure water jets, which can damage the vinyl wrap. A microfiber wash mitt is your best friend; these are gentle and help prevent scratches. Always rinse thoroughly to remove all soap residue.
Drying with a clean, soft microfiber towel will help prevent water spots. Consider using a quick detailer spray between washes to remove light dirt and dust.
Preventing Damage to the Vinyl Wrap or Paint
Protecting your investment involves more than just regular cleaning. Avoid parking under trees to prevent sap and bird droppings from damaging the vinyl. Also, be mindful of sharp objects like keys or jewelry that could scratch the wrap. If you frequently drive on rough roads, consider applying a protective coating over the vinyl to provide an additional layer of protection.
This is especially important in areas prone to rock chips or debris. Think of this protective coating like sunscreen for your car’s wrap – it provides an extra shield against the elements.
Longevity of Different Chrome Delete Kit Materials
The longevity of your chrome delete depends heavily on the material used. High-quality vinyl wraps, properly installed, can last for several years, often three to five, sometimes even longer with good care. However, cheaper vinyl might start to peel, fade, or crack sooner. Consider this: a higher upfront cost for premium vinyl will often translate to a longer lifespan, saving you money and hassle in the long run.
Think of it like buying a good pair of shoes – they might cost more initially, but they’ll last longer than cheaper alternatives.
Potential Long-Term Effects of Installation on the Vehicle’s Paint or Finish
When installed correctly by a professional, a chrome delete kit shouldn’t cause any long-term damage to your Tesla’s paint. However, improper installation or the use of low-quality materials could lead to paint damage during removal. This is why it’s crucial to choose a reputable installer and high-quality materials. If you’re unsure about doing it yourself, consider professional installation.
This minimizes the risk of any potential issues down the line and ensures the best possible results. Think of it like any major car modification—professional work prevents potential headaches later on.
Visual Representation of the Process
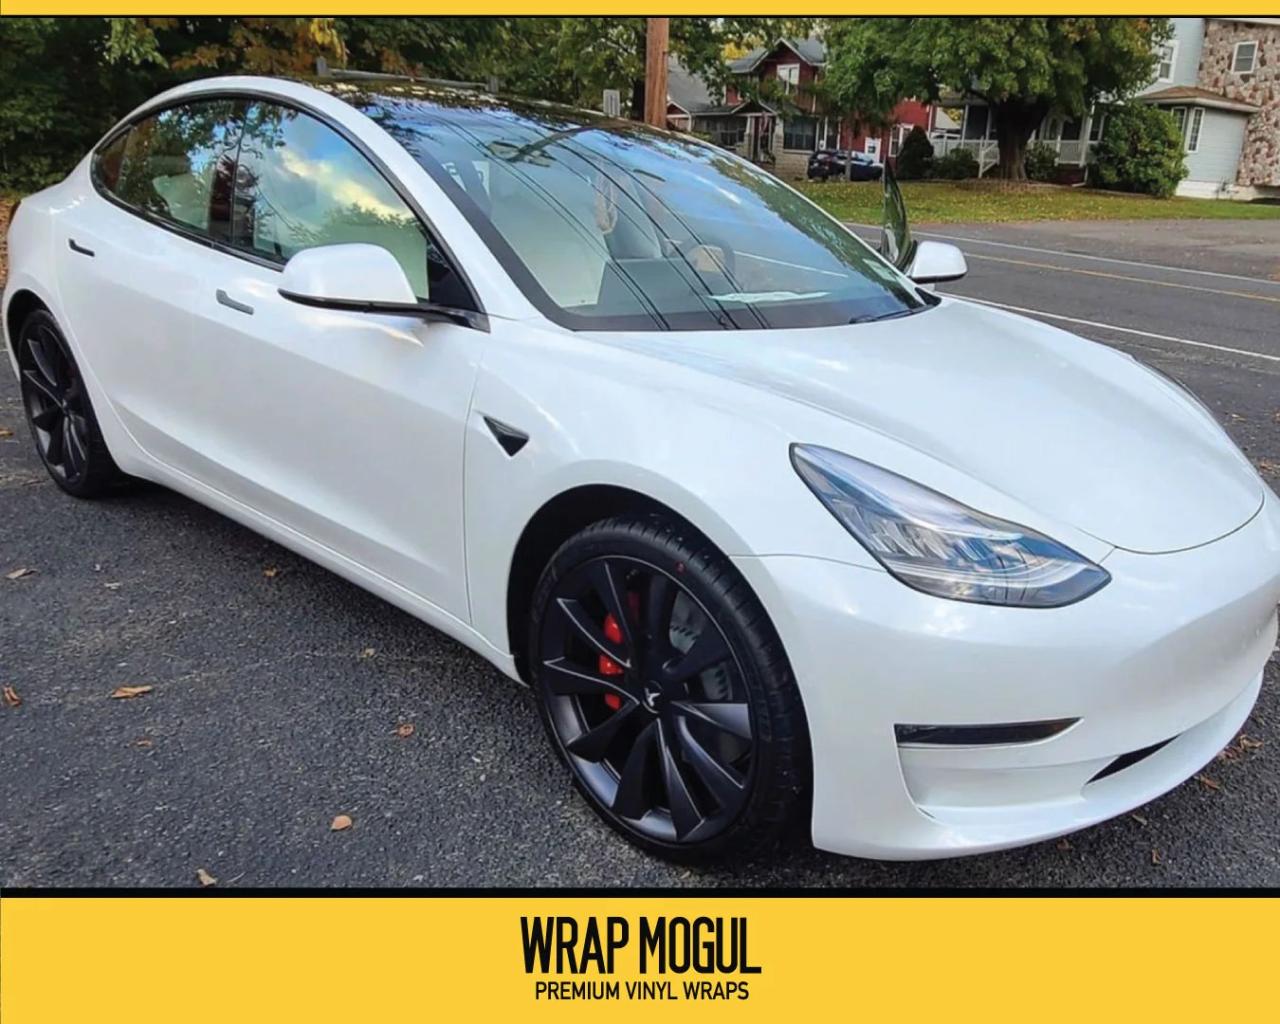
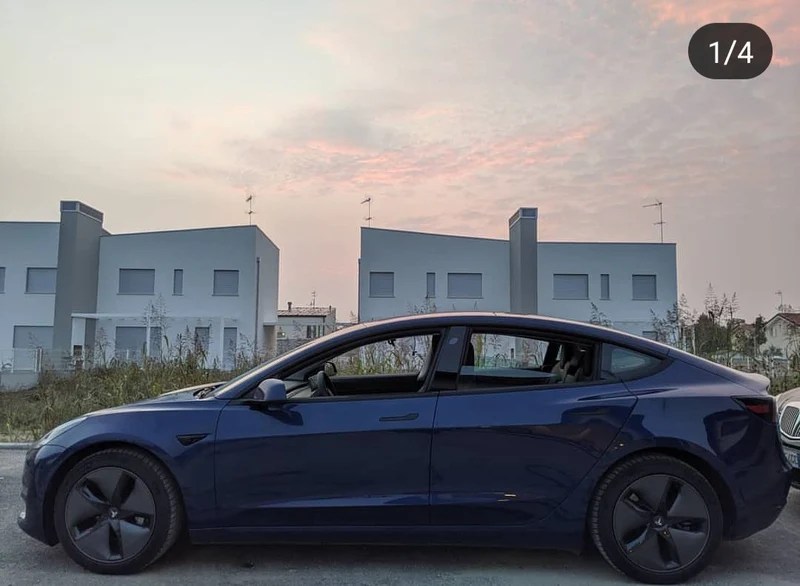
Transforming your Tesla Model 3 with a chrome delete kit is more than just a modification; it’s a visual overhaul that significantly alters the car’s aesthetic. The before-and-after difference is striking, showcasing a shift from a more traditional, shiny look to a sleek, modern, and often more aggressive appearance.Before the chrome delete, a Tesla Model 3 typically presents a blend of glossy chrome accents around the window trim, door handles, and potentially other areas depending on the trim level.
This chrome reflects light, creating bright highlights that can sometimes appear a bit flashy. The overall effect is a somewhat formal and polished look.
Tesla Model 3 Before and After Chrome Delete
The post-chrome delete transformation is dramatic. The shiny chrome is replaced with a matte or gloss black (or other chosen color), instantly creating a more cohesive and unified appearance. The car looks lower to the ground, more aggressive, and decidedly less flashy. The subtle curves and lines of the Model 3’s body are now emphasized, rather than the reflections distracting from them.
The overall effect is a more contemporary and sophisticated aesthetic, depending on the chosen finish. Imagine the difference between a sharply dressed businessman in a suit and the same man in a stylish, minimalist outfit – that’s the kind of visual impact a chrome delete provides.
Stages of Installation: A Visual Journey
The installation process itself unfolds in distinct visual phases. First, meticulous surface preparation is crucial. This involves thoroughly cleaning the targeted chrome areas with a degreaser, ensuring a perfectly clean and smooth surface for optimal vinyl adhesion. This stage is less visually exciting but incredibly important for a successful result. Imagine meticulously prepping a canvas before painting a masterpiece – the groundwork is invisible, but vital.Next comes the vinyl application.
This is where the transformation becomes visually apparent. The installer carefully applies the pre-cut vinyl pieces, smoothing out any air bubbles or wrinkles to ensure a seamless, wrinkle-free finish. This step involves a lot of precise maneuvering and careful attention to detail. You’ll see the black vinyl gradually covering the chrome, subtly changing the car’s appearance with each piece applied.
So, you’re thinking about Chrome delete kits for your Tesla Model 3? Totally get it, that shiny chrome can be a bit much. But before you dive into that, you might want to check out the best way to keep your giant iced coffee from spilling all over your new, de-chromed interior; check out this article on Best car cup holders for large tumblers for some serious upgrade ideas.
Then, once you’ve got your caffeine situation sorted, you can totally focus on those sweet chrome delete kits.
Think of it like a high-definition sticker, transforming the car’s look one piece at a time.Finally, the completed chrome delete reveals the final aesthetic. All the vinyl is applied, and the car is thoroughly inspected for any imperfections. The result is a sleek, clean look, with the once-shiny chrome now a matte or gloss black, depending on the kit.
The car looks more modern and unified. The difference is immediately noticeable and striking, a testament to the transformative power of this relatively simple modification.
Visual Differences Between Finishes
The choice between matte and gloss black (or other colors) dramatically alters the final visual outcome. A matte black finish provides a subdued, stealthy appearance. It minimizes reflections and creates a more understated, sophisticated look. Imagine the smooth, velvety texture of dark charcoal – that’s the feel a matte black finish evokes.In contrast, a gloss black finish offers a high-shine, almost mirror-like reflection.
It provides a more striking and visually impactful result, adding a touch of aggressive flair. Picture the deep, rich shine of a polished obsidian – that’s the impression a gloss black finish creates. The gloss finish emphasizes the curves and lines of the car more prominently than the matte. The choice between matte and gloss is largely a matter of personal preference, but both dramatically alter the car’s visual personality.
Legal and Warranty Considerations

Modifying your Tesla Model 3, even with something seemingly straightforward like a chrome delete kit, carries legal and warranty implications you should be aware of before diving in. Understanding these potential issues can help you make an informed decision and avoid future headaches.Tesla’s warranty is extensive, but it’s not a blank check. Modifications, particularly those that alter the vehicle’s exterior, can potentially void or limit coverage for related parts or systems.
While a chrome delete itself is unlikely to directly cause mechanical failure, damage during installation or subsequent issues arising from the modification might not be covered under warranty. This is especially true if the installation process damages the paint or existing trim.
Warranty Implications
Tesla’s warranty covers defects in materials and workmanship, but it explicitly excludes damage caused by modifications. For example, if the removal of the chrome trim damages the underlying paint, requiring a costly repair, that repair would likely not be covered under warranty. It’s crucial to install the kit carefully, following the manufacturer’s instructions precisely to minimize the risk of damage.
Additionally, documenting the installation process with photos can be helpful if a warranty dispute arises. Remember, always consult your Tesla warranty documentation for specific details and exclusions.
Legal Considerations Regarding Vehicle Modifications
While changing your car’s appearance is generally permissible, there are some legal nuances to consider. Local and state laws might have regulations regarding modifications that affect vehicle safety or visibility. For instance, some jurisdictions have restrictions on window tints or modifications that obstruct lights. Ensure your chrome delete doesn’t violate any such regulations in your area.
If you’re unsure, checking with your local Department of Motor Vehicles (DMV) is always a good idea.
Resale Value and Modifications
Modifications, even seemingly minor ones like a chrome delete, can impact your Tesla’s resale value. Some buyers prefer completely stock vehicles, while others might be interested in specific modifications. A chrome delete could appeal to some, but it might deter others. Therefore, carefully consider your potential buyer pool and whether the modification aligns with their preferences.
When selling, be transparent about the modification, providing documentation of the installation and highlighting any potential benefits or drawbacks.
Reversing the Chrome Delete Process
Fortunately, reversing a chrome delete is usually possible, although the difficulty varies depending on the type of kit used and the quality of the installation. Some kits are designed to be easily removed without leaving any residue, while others might require more effort and potentially some touch-up work. If you decide to revert to the original chrome trim, ensure you have the original parts or access to replacements.
It’s wise to keep the original chrome pieces and packaging if you plan on removing the kit later.
Epilogue: Chrome Delete Kits For Tesla Model 3
So, there you have it – your complete guide to conquering the chrome delete on your Tesla Model 3. Whether you’re going for a subtle upgrade or a total transformation, remember to plan ahead, choose your method wisely, and don’t be afraid to ask for help if you need it. With a little patience and the right approach, you’ll be cruising around in your stealthy, revamped Model 3 in no time.
Now go forth and unleash your inner automotive artist!


